Introduction
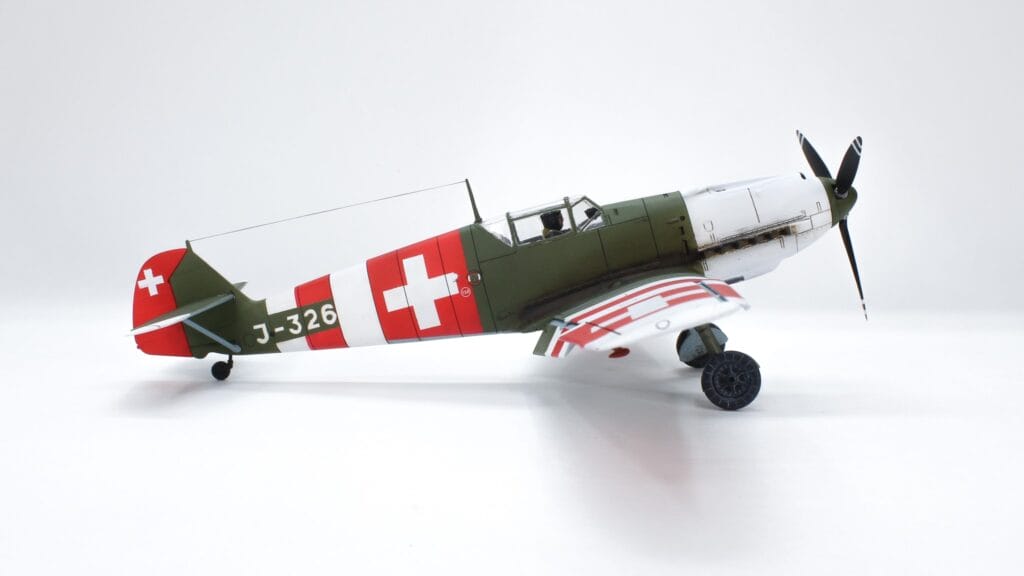
Straight up, the Tamiya Bf 109 E-3 is a fantastic kit. With a small part count and fantastic fit, the Tamiya Bf 109 E-3 in Swiss markings is a kit that allows total focus on the artistic skills of model building. If you’re looking for a kit to challenge your masking, decal (if you so choose), painting, and finishing skills, this is the one to get. What results is a gorgeous Swiss Air Force scheme that will grab the attention of anyone checking out your showcase.
Speaking of showcase, go check out the finished build!
The Kit
The Tamiya Bf 109 E-3 is an older kit that dates back to Tamiya’s slew of 1/48 WWII aircraft tooled in the 90’s. Specifically, this kit was tooled in 1996 according to Scalemates. It holds up well. One thing that stands out is just how small the Bf 109 is. At first glance I thought I bought a 1/72 scale kit. Compared to the Tamiya Corsair it’s almost half the size. I wouldn’t begrudge anyone for skipping the 1/48 scale kit and going up to a 1/32 scale kit.
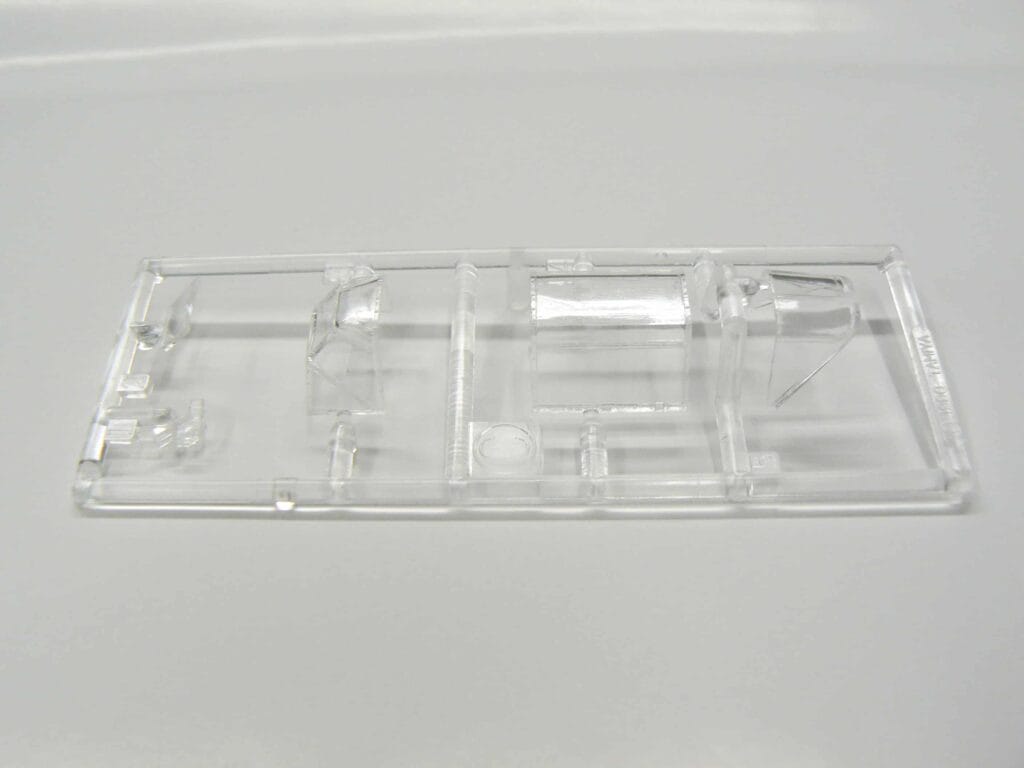
You get three sprue trees including one clear part. All parts are finely detailed with no evidence of shrinkage, deformities, or flash. The clear parts are also thin, clear, and have excellent details. The instructions are for the original Bf 109 E-3 but Tamiya includes a terrific glossy foldout sheet of the two Swiss schemes. Finally, the decals are typical Tamiya quality. I would avoid them, but more to be said on that later.


Construction
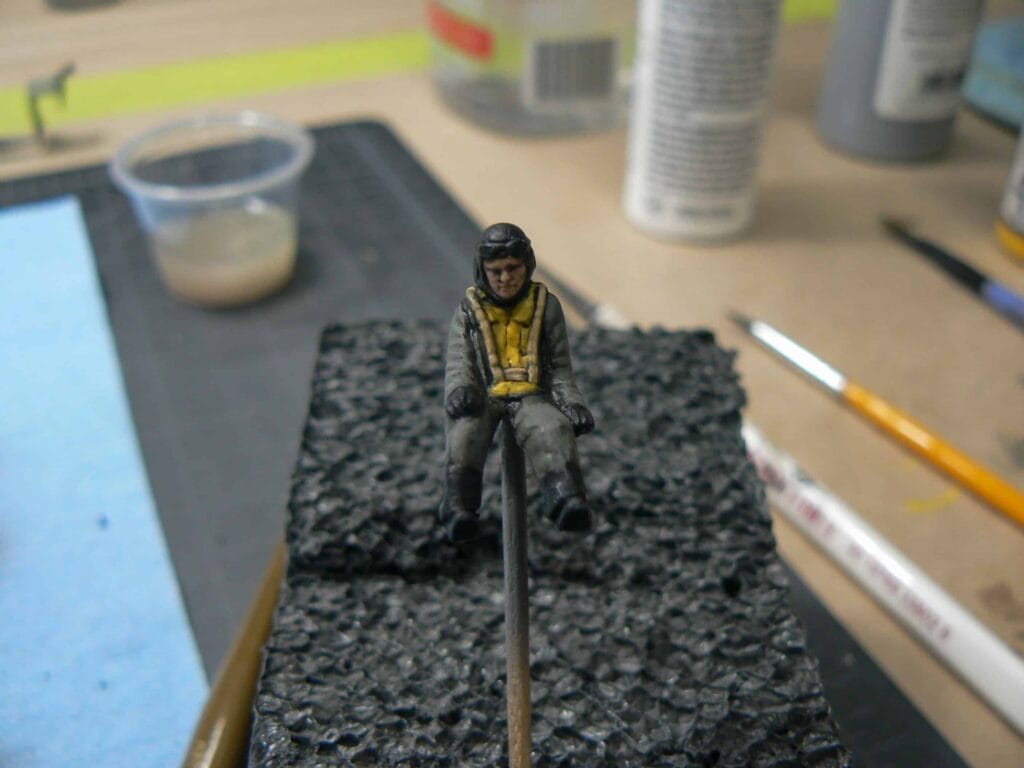
The build begins with a nicely detailed cockpit section and sidewalls. Exactly what you would expect from their other 90’s era kits like the Spitfire and F4U Corsair. The instrument panel has nice raised details and a decal is included if you wish to use it. A decent seat along with a control stick, rudder pedals, and trim wheel is included as separate parts. A pilot figure is also included which I did choose to use on this build. The Tamiya Bf 109 has a small cockpit which sits low in the fuselage so unless you position the canopy open I wouldn’t sweat too many interior details.
The cockpit is then secured in between a two part fuselage which fits together very well. One nice thing about the 109 is that the upper and lower fuselage actually have (to debatable degrees) visible seam lines. I mistakenly filled them in and then went back and rescribed them. It made them less subtle which ended up being a win-win situation. So don’t get caught up on filling those seams!
One of the least detailed parts is the engine exhausts. Just a simple Lego block looking part. If you were going to go aftermarket I would suggest you start here. Otherwise you attempt to drill out the exhausts but I opted to leave them. I suggest ignoring the instructions and installing them at the end after painting separately. A little white glue and they drop right in.
Next up the wings snap together in two parts. Depending on how clean you are taking them off the sprue there should be minimal gaps. As always, Tamiya engineered the seams to go along actual panel lines so little to no filling is needed. The instructions call for installing the pitots and AoA sensors but I would leave them off until the end.
Once the wings are together you can put on the elevators, rudder, engine cover and canons. Again, the engine cover goes along panel lines and fits wonderfully bypassing any sanding and filling if you’re careful.
This is then followed up by installing the flaps, slats, and lower engine air intake. The air intake sub assembly was a little tricky to get the angles right but the whole part essentially drops in. I had a larger gap on the lower fuselage that needed filling, sanding, and rescribing. The flaps and slats can be installed up or down, however you choose. To do so you just have to nip off the locating tab on part. Easy.
The landing gear is next and includes one piece tires with detailed tread. This is the way to mold the piece since only small portion needs sanding rather than a seam along the radial of the tire. The gear doors are a little tricky to sit properly especially when painting separately. One of the most hotly contested issues with Bf 109s is the unique angle of the landing gear. The Tamiya Bf 109 includes a very nice nub on the end that fits flawlessly into the wheel well to achieve the proper angle. As usual with gear, paint it separately and leave it off until the end. Especially since the fit is so good.
The prop consists of three simple parts and a poly cap. You’ll need to paint each part separately and it can be left to be installed at the end.
Finally, the three piece canopy is installed and it fits like a dream. The middle section, which can be positioned open or closed, had two locator tabs that fit flush and secure in the fuselage. Glue may not even be needed. I choose to trim the tabs off the close it up. Two armor plates are also included for the canopy should you choose to use them.
At this stage the two wing leading edge guns can be installed as well as the antenna mast behind the canopy.
That’s all folks! A really simple and quick build.
Painting
The slammer build nature of the kit brings us to the eagerly awaited painting and markings. The markings can be painted fairly easily. Even with simple masking tape. I used a Cricut to cut vinly masks out of Oramask. A lot of planning out here goes a long way.
The main strategy was to paint light to dark. Should I overspray any areas it’s a lot easier to cover a lighter color with a darker than the opposite. Especially when using such contrasting colors as green, white, light blue, and red.
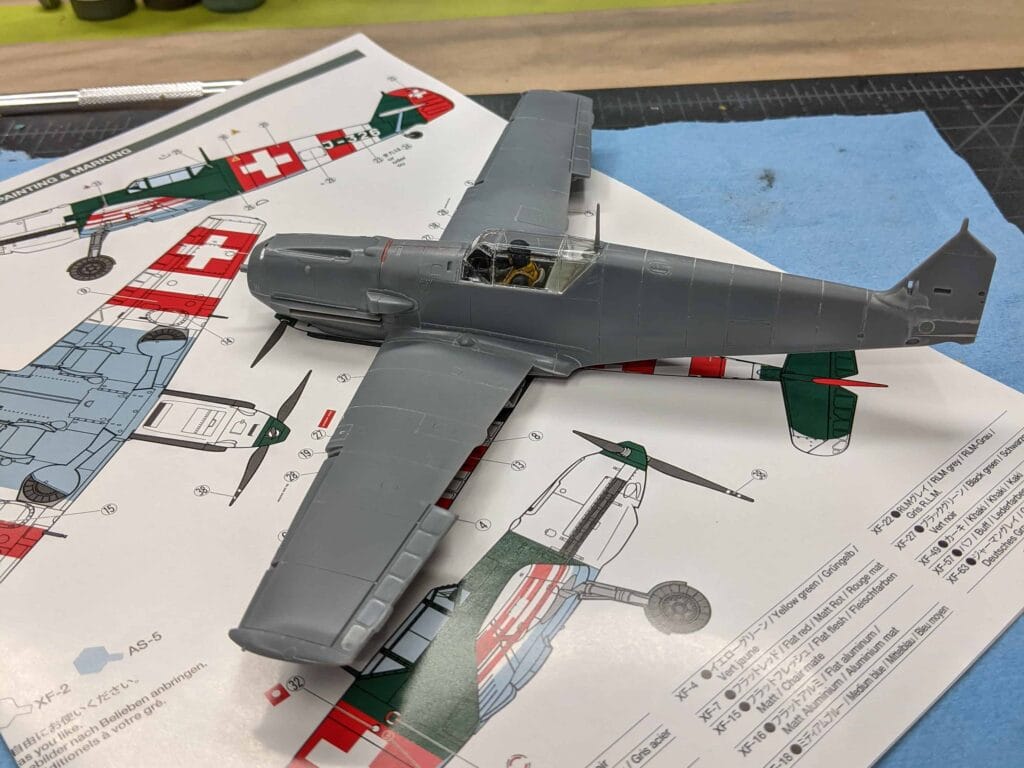
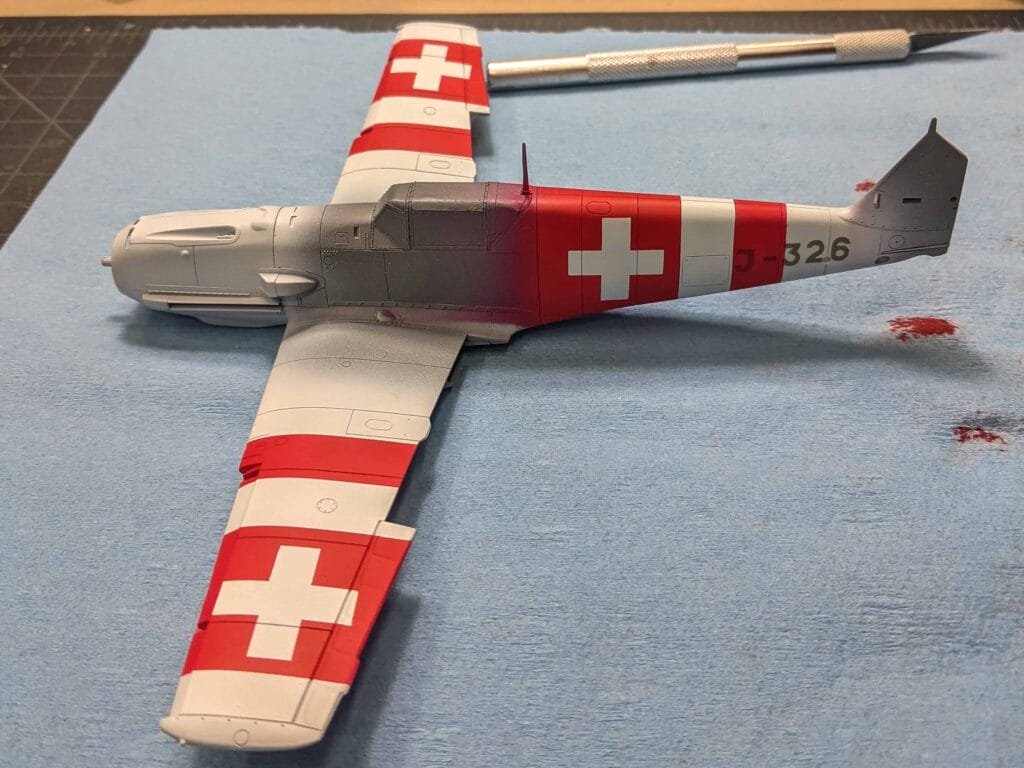
White from Mission Models was up first after the entire kit was primed with Badger Stynylrez Gray. The front engine area, majority of the upper and lower wings were sprayed.
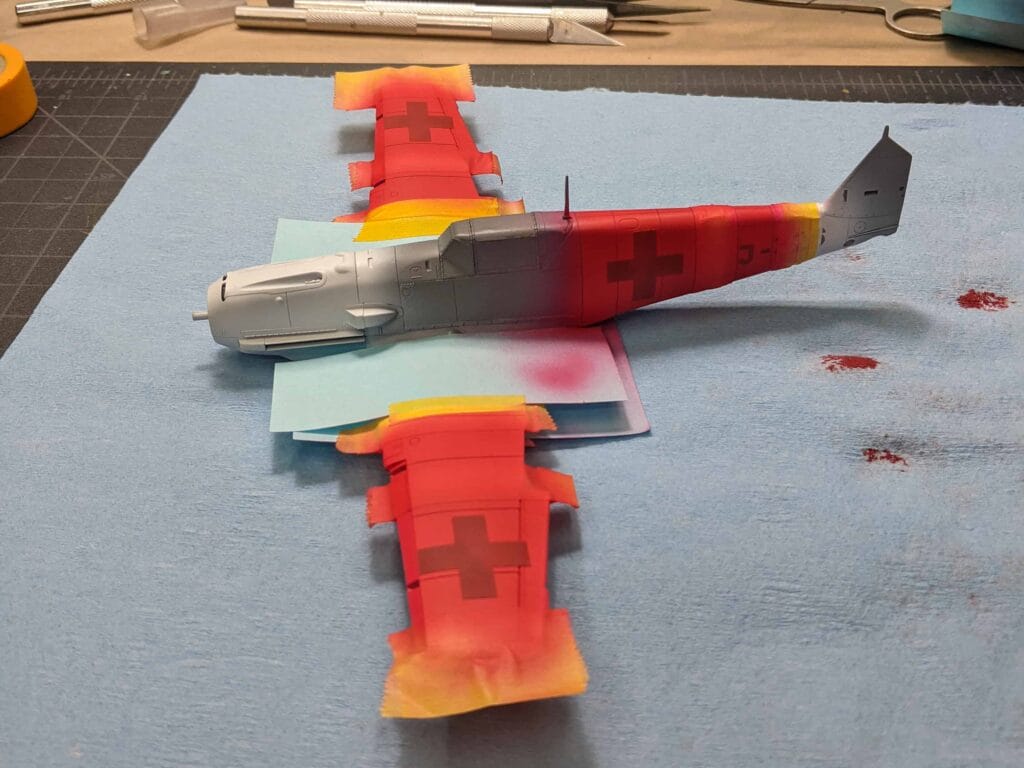
Next, the white areas were masked and a basic red from Mission Models was used in light coats. You can see the process below.
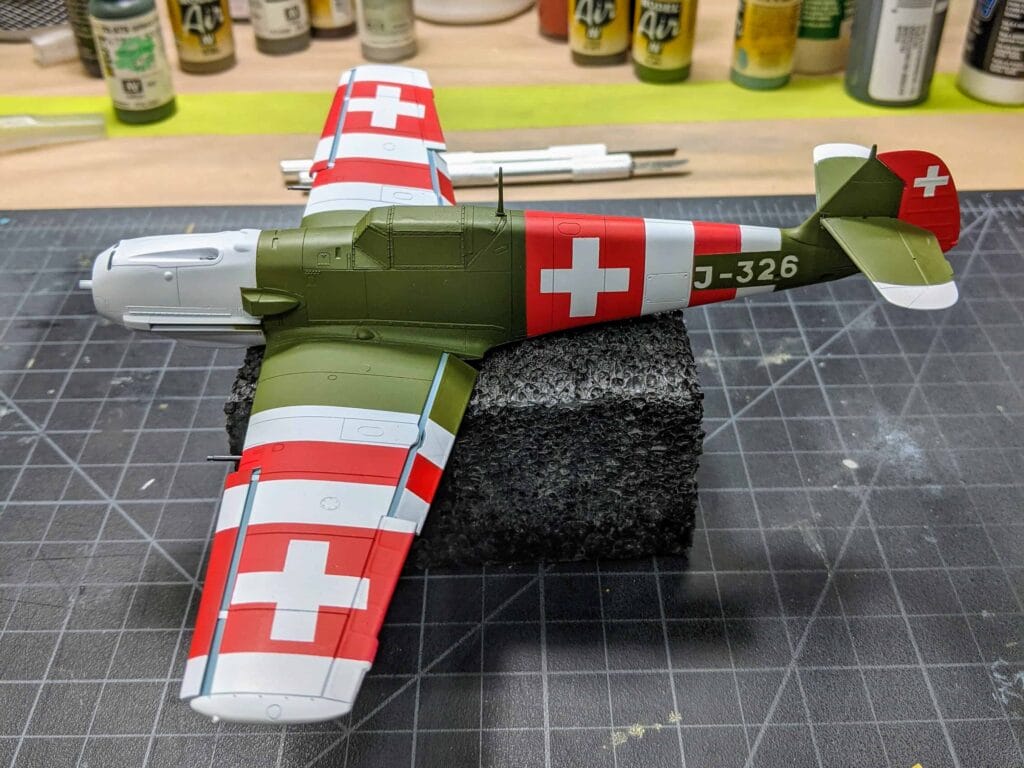
Then the red and white areas were painted using a custom mixture of Vallejo Model Air RLM71 dark green and little bit of white.
Finally, the lower fuselage and wings were painted with RLM65 light blue.
This took A LOT of time and I nearly used up a whole role of Tamiya masking tape in the process. It was well worth the effort. Expect mistakes and overspray. Even after religious masking there was still the occasional overspray or bleed that needed touch up.
The squadron markings on the Tamiya Bf 109 were also masked and painted but didn’t turn out as well as I’d hoped. I would’ve been better off using the small decals for this.
The slats, flaps, and gear were all painted separately. A tremendous amount of attention was paid to ensure the neutrality stripes lined up. This wouldn’t be an issue if built in the retracted position. Also the support for the horizontal stabilizers was also painted and assembled separately. It needs to be the RLM65 color and would be a nightmare to mask.
Decals and Livery
Unfortunately, I forgot to take a scan of the decals but they are typical Tamiya. The colors and details are vivid but they are thick. They included decals for every red neutrality stripe. I don’t know of anyone that has used them but I cant image it looks good, even if they were set properly to the model. There’s just to many points of alignment and curves that could lead to failure. Discard them and opt to enhance your masking and painting skills.
Included are just two different squadrons but no special pinup or art. The only difference would be in number or color scheme as one does not have neutrality stripes. If you’re getting this kit you’re most likely going to do the version with the stripes.
Final Thoughts
The Tamiya Bf 109 E-3 Swiss is truly a fantastic kit. You can fly through the construction as you would a slammer build and focus a vast majority of your time on masking and painting the vivid scheme. If you’re looking for a change of pace build or just want to hone your detail painting skills, this is the kit to get. I highly recommend it!