This is part of a series originally published on Britmodeller.com. You can view the original article HERE.
Inserting the Cockpit
Some minor progress. Have put the seats together as seen below.
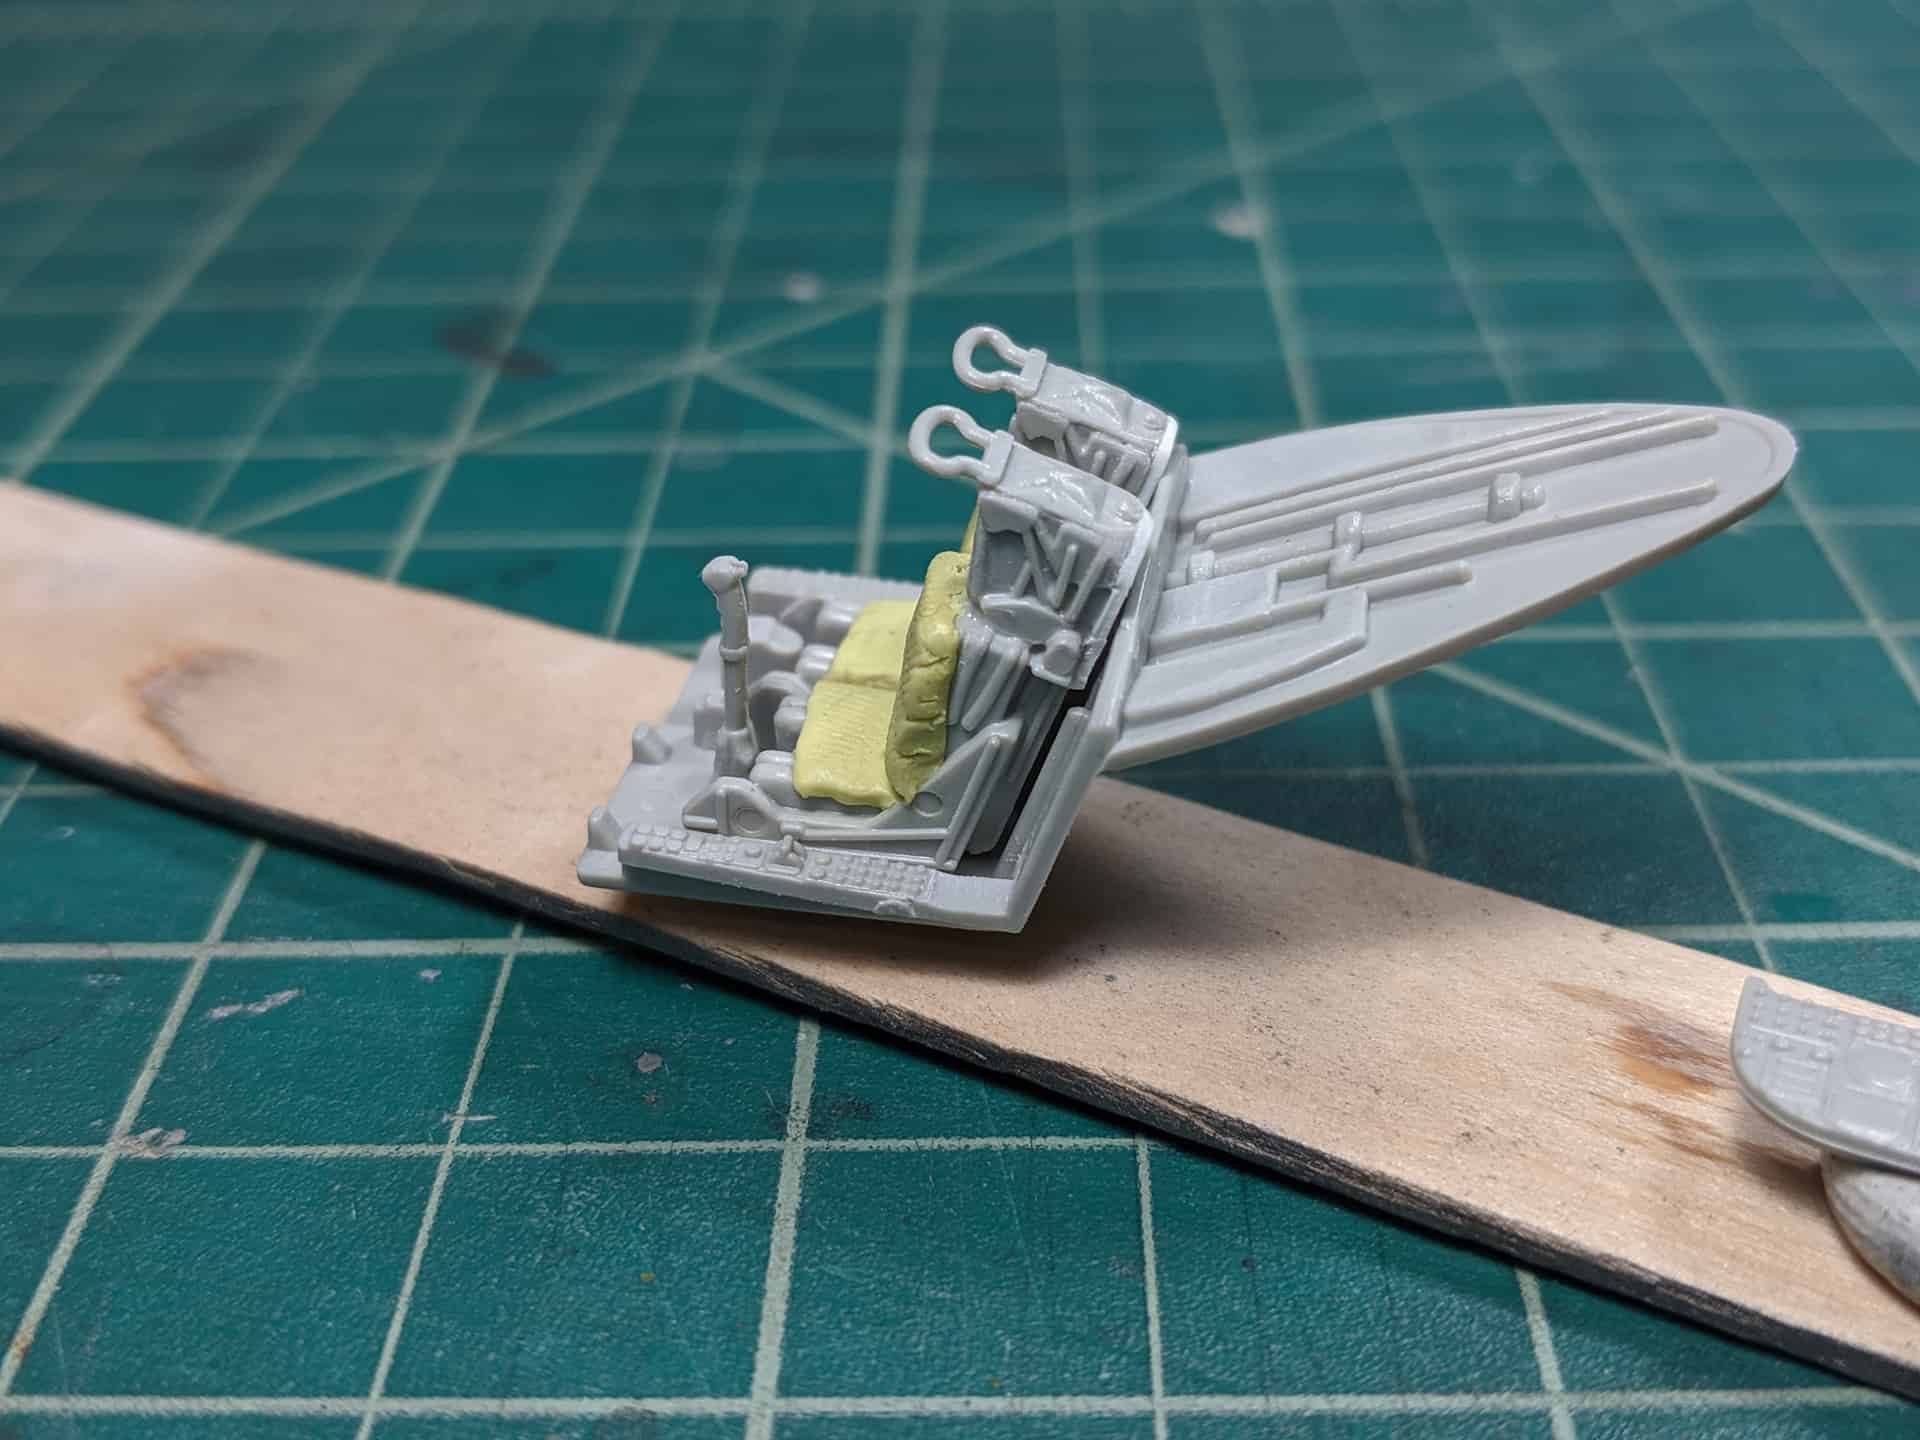
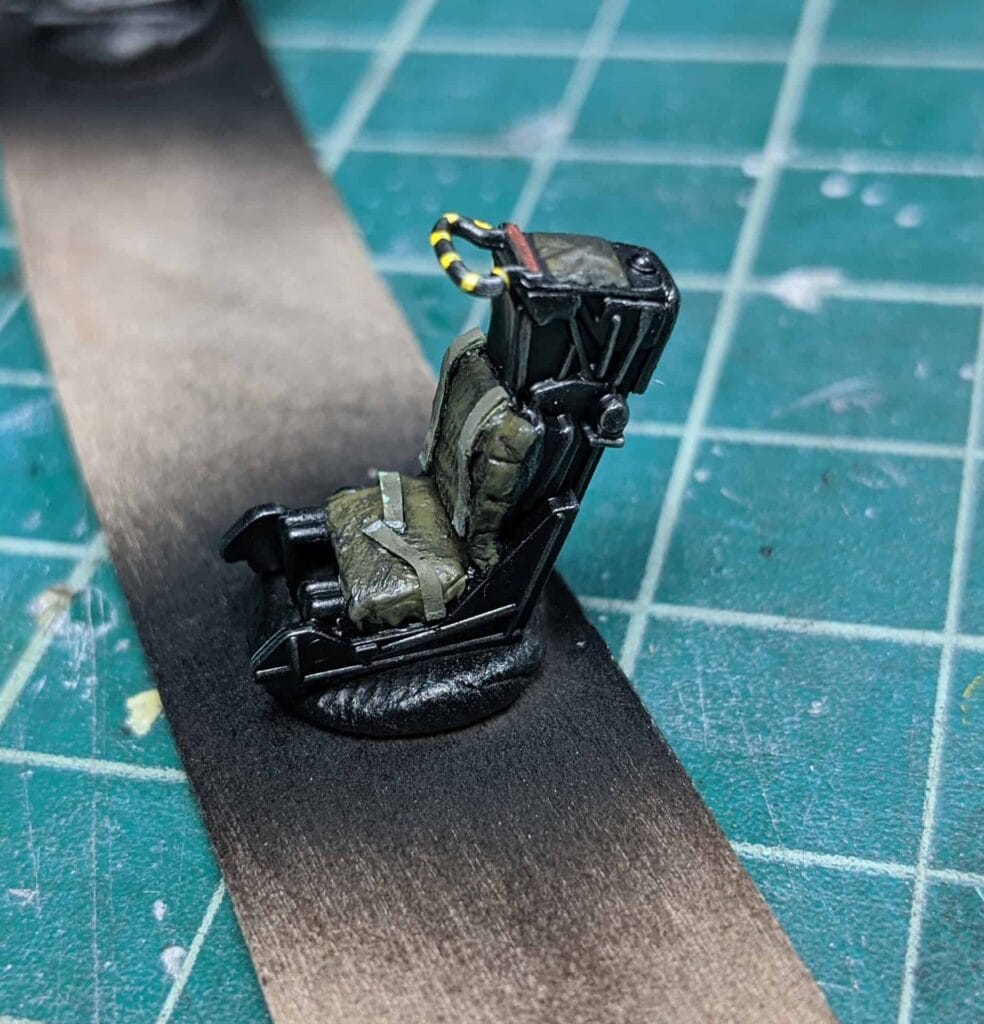
Good amount of detail for this scale including the overhead ejection pull handle. However, it has a giant ejector pin mark dead center of the sea near the top of the belts. No way to sand that without ruining detail.
Also you can’t see it from the images but there is a big ugly empty space on the back of the seat. When installed you can see it through the canopy.
I glued on some plastic card and sanded to shape. Now when the seats are installed and viewed from behind there is no gap!
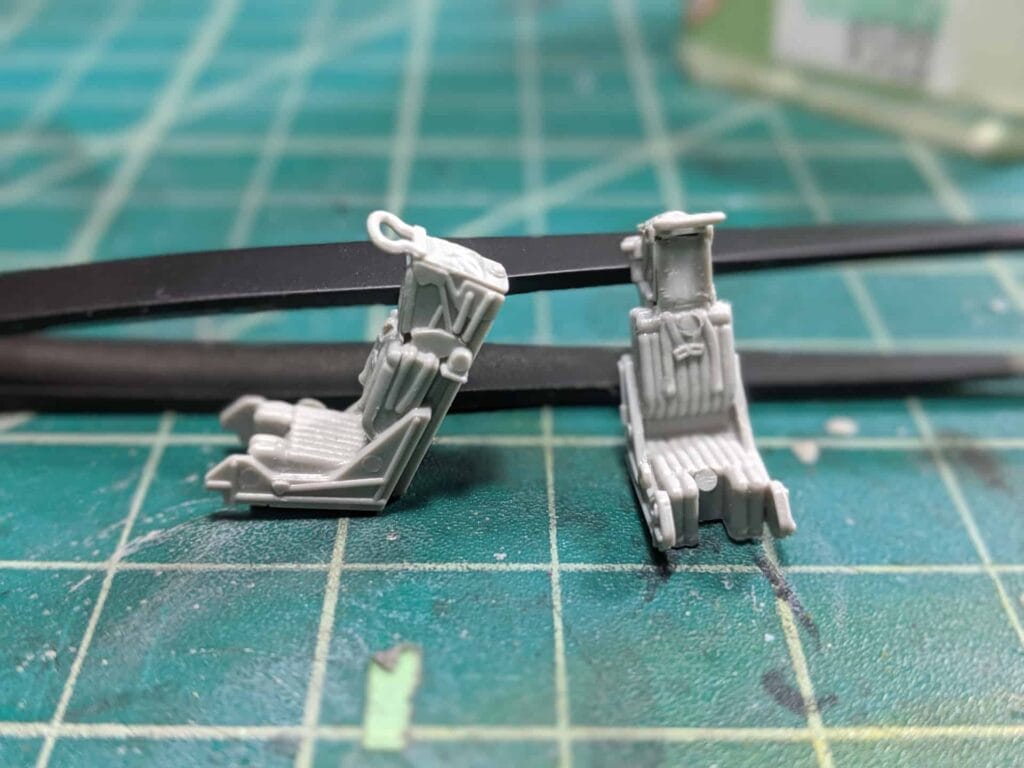
So, with that I picked up some Milliput and have been itching to try it out. So here we go!
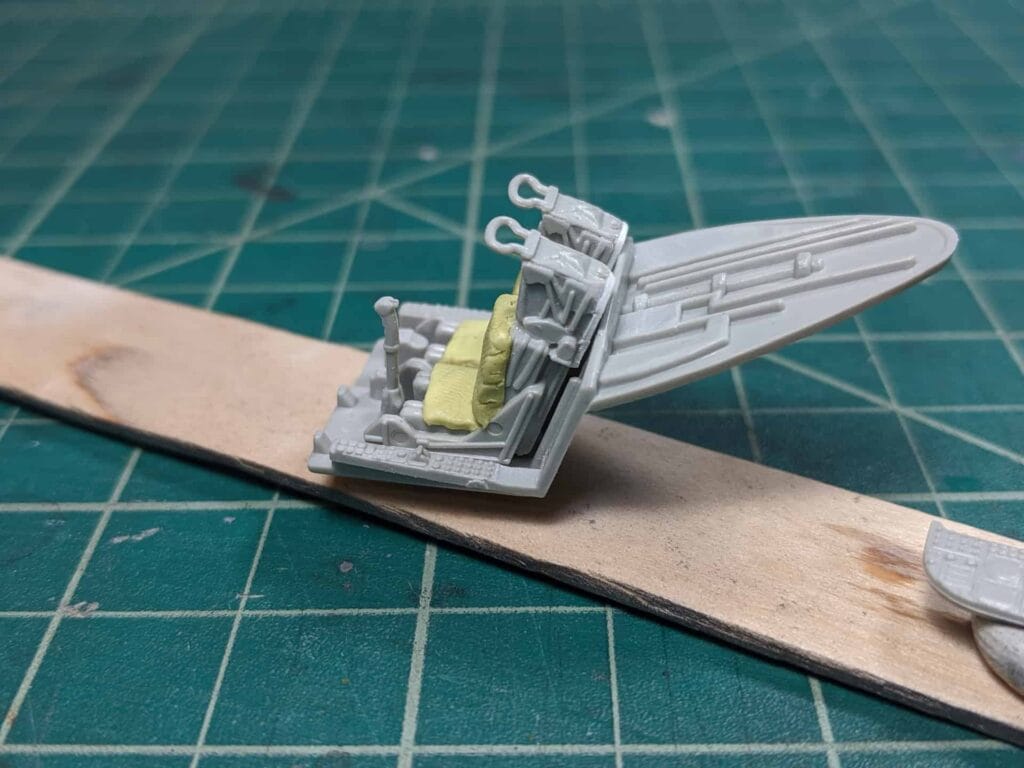
And the profile view:
Not too bad! The texture looks roughly done but as with all things modeling it will look much much better after priming and painting.
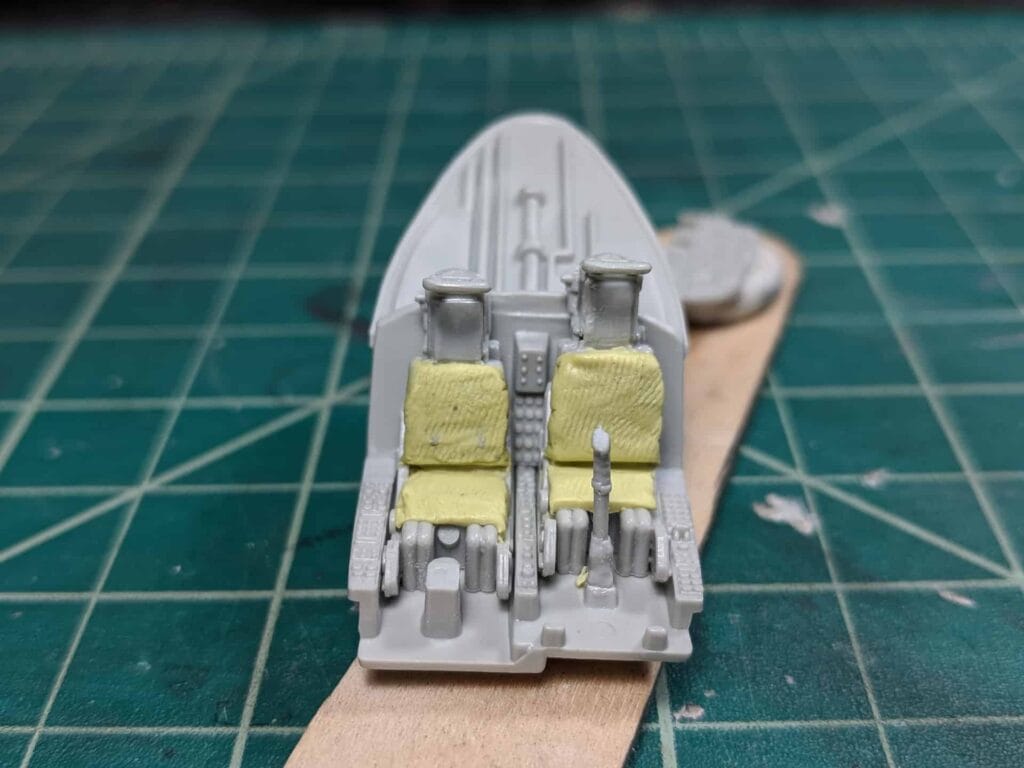
I will also be adding some Tamiya tape seat belts as well.
Still impressed by the out of box detail of the wiring and pipes. Don’t think anything else will need to be added.
Painting the Ejection Seats
Seats are done, cockpit is done, and fuselage is glued together.
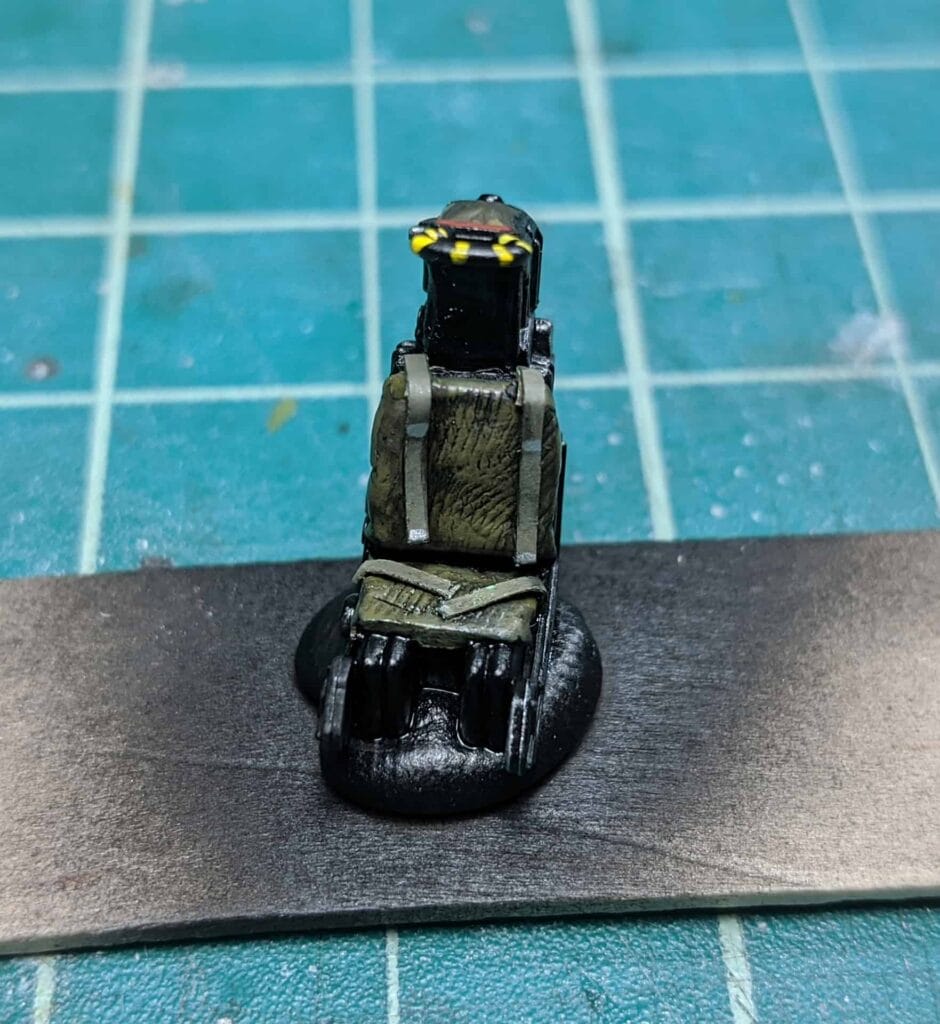
First, let’s start with the seats. They were painted up, given a silver dry brush, and then a black enamel wash (tamiya). Scroll up to see what the seats originally looked liked. Not a huge improvement but a little more uniqueness to them.
Seat belts were done with tamiya tape.
Instrument Panel
Next up, we have the instrument panel and cockpit.
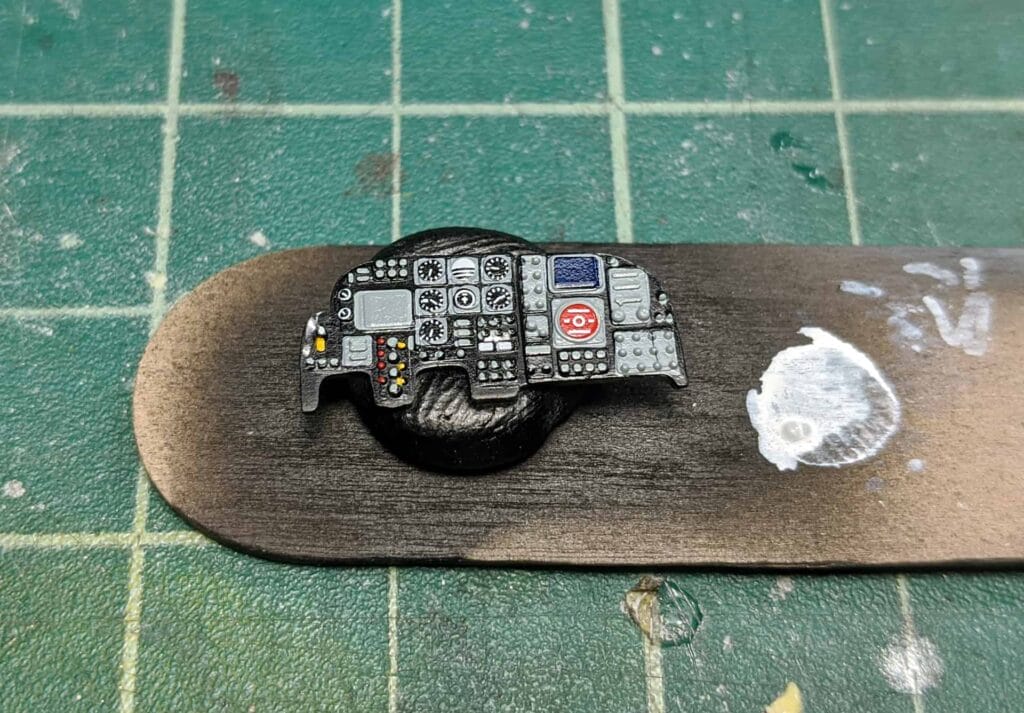
The IP was painted up in black and I decided to use the two part decal. After a few go overs with Solvaset it layed down nicely. I liked the gauge detail which is why I went with the decal instead of hand painting.
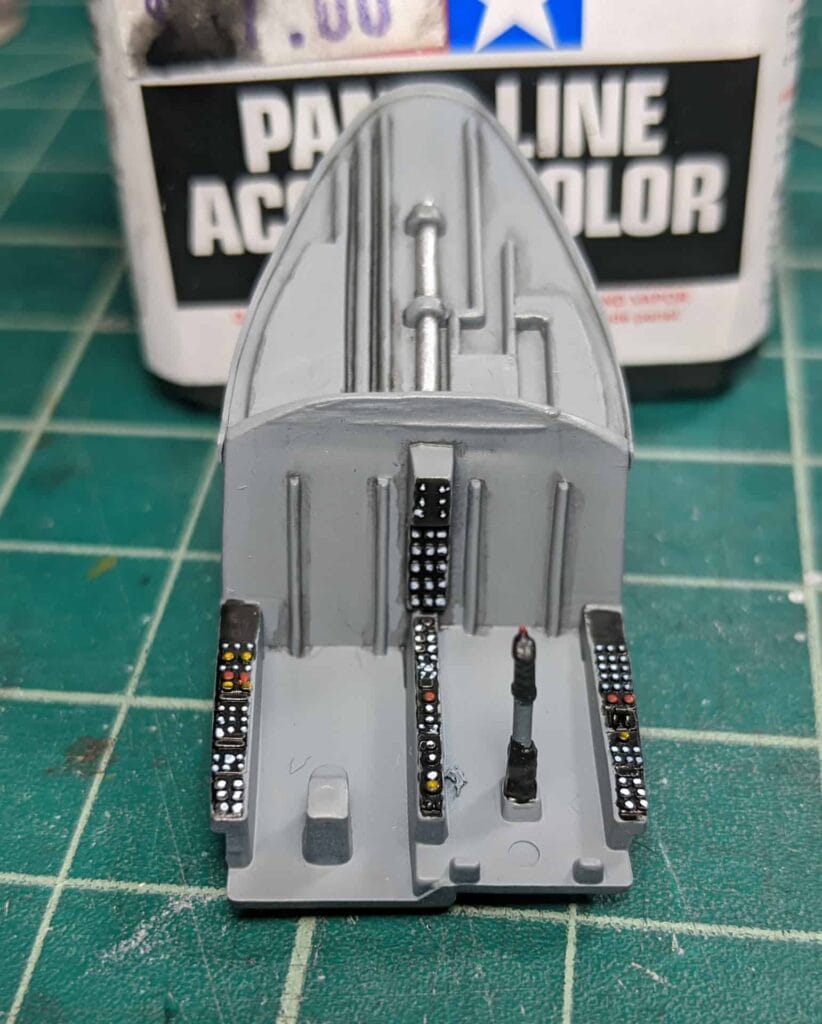
The cockpit was painted in Dark Gull Gray (FS36231) and the panels were painted black with white, red, and yellow buttons. As a side not, I never realized just how bad some of these things can look up close. It looks 10x better from a normal viewing distance. Also, black panel wash applied and there is a goober to the left of the control stick. That’s some dried milliput that got there somehow. It won’t be visible once installed.
Next post we will dive into the hell hole that is fitting the cockpit and IP into the fuselage.